


Setup
From a fresh checkout to a collector reading your lab.
1. Install
LabRat needs Python 3.11 or newer, SQLite, and Git. The collector needs network access to the controllers you connect. From the repository root:
python3 -m venv .venv
. .venv/bin/activate
python -m pip install -e .
cp local_config.example.toml local_config.toml
Prefer containers? The repository has a sample image and Compose file that run the web app and the collector from one image, writing the config for you on first start:
mkdir -p deploy/data deploy/config
export LABRAT_UID=$(id -u) LABRAT_GID=$(id -g)
LABRAT_ALLOWED_HOSTS=labrat.example.lan \
  docker compose -f deploy/compose.yaml up -d --build
Then skip to step 4. The repository's docs/setup.md, under Run in containers, covers checking it, permissions, the port, HTTPS, MikroTik discovery, and upgrades. For a cluster, deploy/kubernetes.yaml is a sample deployment; Run on Kubernetes in the same file covers storage, probes, upgrades, and which discovery needs the lab's own network segment.
2. Write the private configuration
local_config.toml is ignored by Git and holds everything private: the session key, the database path, the browser hosts LabRat accepts, and later your integration credentials. Before the first start:
- Set
[auth] secret_keyto a new random value:python -c 'import secrets; print(secrets.token_urlsafe(48))'. - Set
[server] allowed_hoststo the hostnames or addresses people will type into their browsers. Without it, only loopback hosts are accepted. - Leave the session cookie's secure flag off only for plain-HTTP development; turn it on behind HTTPS.
3. Create the database and start
alembic -c alembic.ini upgrade head
gunicorn -c gunicorn.conf.py labrat.app:app
Run the migration again after each upgrade; Flask never creates tables on its own. The checked-in Gunicorn config listens on 127.0.0.1:8000. For a VM, container, or reverse proxy, choose a bind address in your deployment and add its hostname to allowed_hosts.
4. Create the administrator
Open LabRat and select First-time setup to create the first account, which is the administrator. The form asks for a one-time setup code, which keeps anyone else who reaches the page first from claiming it: LabRat prints LabRat first-time setup code: … to its log when it starts (for the containers, docker compose logs web), and keeps it in the .setup-code file beside the database. Setup closes as soon as that account exists. That account manages integrations, discovery, placement, and exports.
5. Connect your controllers
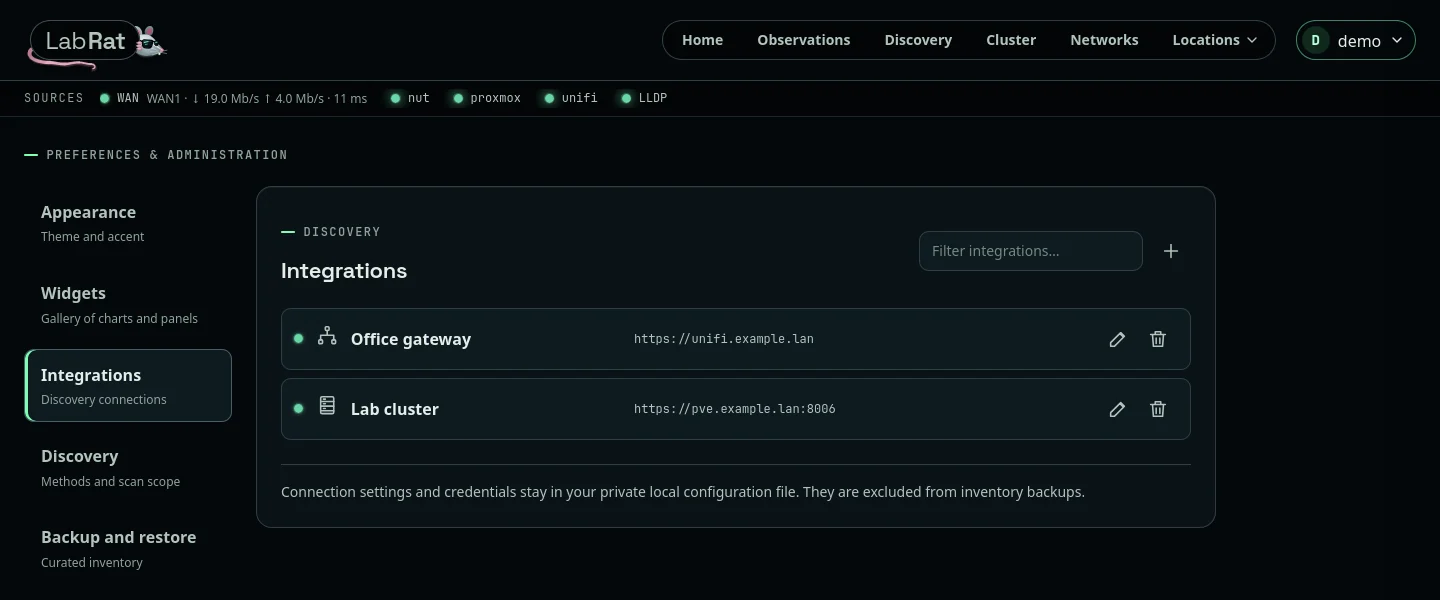
Open Settings from your name in the header, then Integrations. Each connection shows its status, address, and edit and delete buttons; the filter narrows a long list.
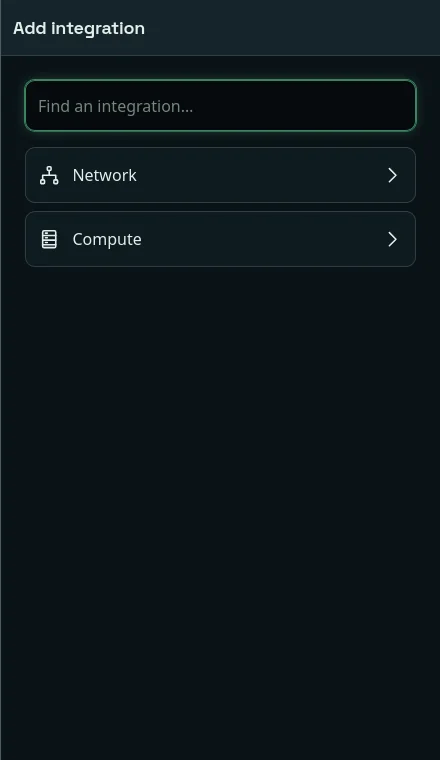
Select + to open the catalog, choose a category, then the product. The first integrations are UniFi Network (an API key), Proxmox VE (an API token ID and secret), and Pi-hole (an application password); new ones join the same catalog as adapters are added. Use credentials with read-only access: the collector only reads. For Proxmox, granting the token VM.Audit on /vms also lets Discovery recognize your VMs and containers among network clients.
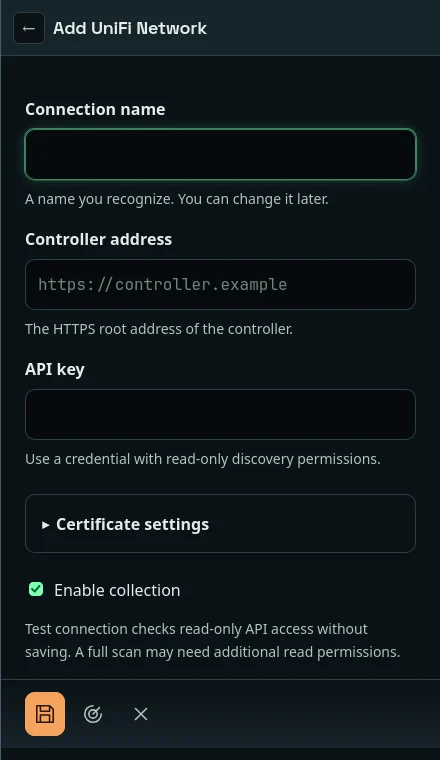
Test connection checks read-only API access without saving or running discovery. Certificate checking is on by default; under Certificate settings you can point at your own CA bundle, or turn checking off for a controller reached by IP address with a self-signed certificate (the connection stays encrypted, but trusts whatever answers at that address). Saved connections, and their credentials, go into local_config.toml, never the database. A running collector picks up the change before its next full scan.
6. Choose what the collector may scan
Settings → Discovery lists the discovery methods beyond your controllers. Each has a switch and an edit button; switching a method off keeps its settings and everything it already found.
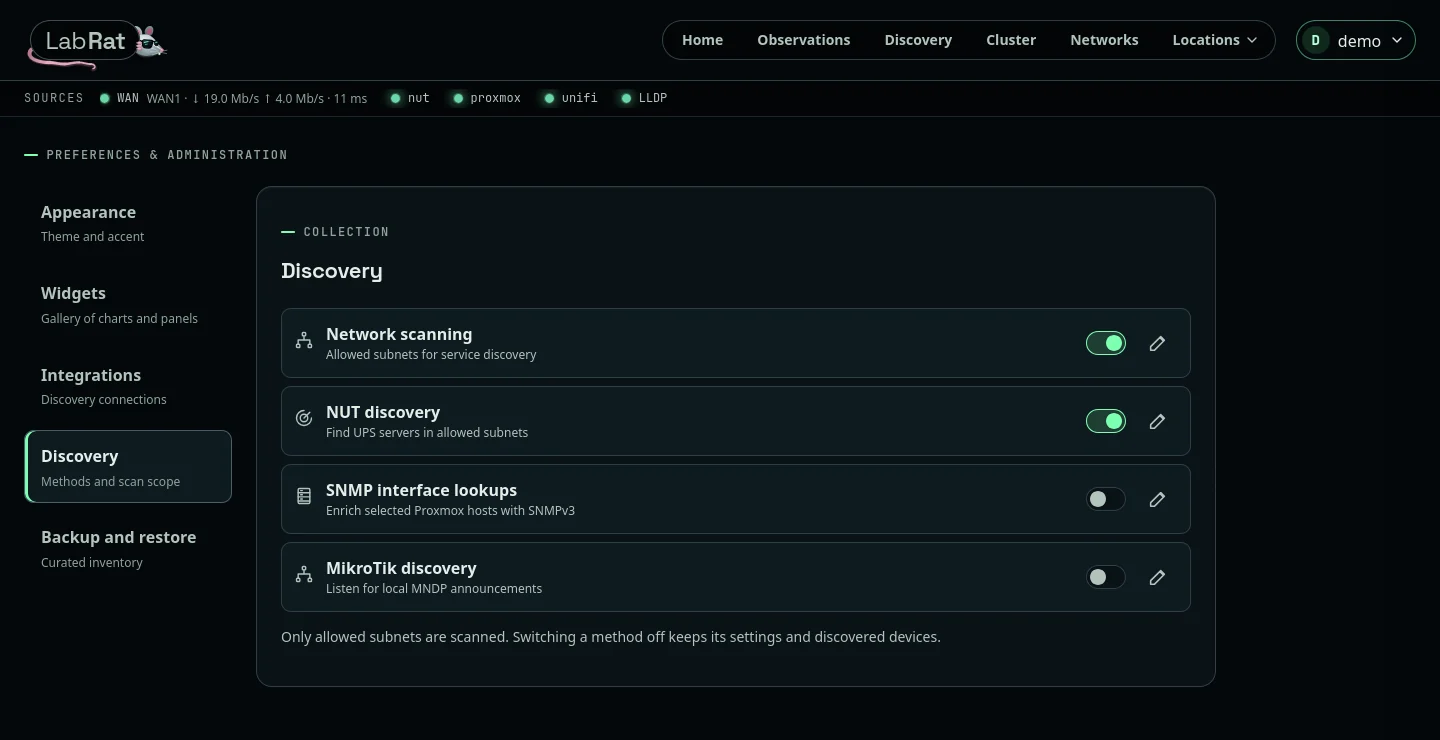
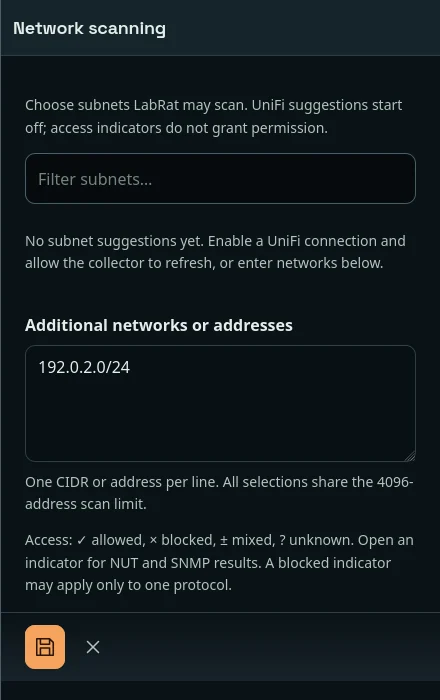
- Network scanning is the permission list. LabRat only contacts addresses inside the subnets you allow here. UniFi suggests the networks it knows, but every suggestion starts off; you switch on the ones LabRat may scan, and can add other networks or single addresses, one per line. All selections share a 4096-address limit.
- NUT discovery finds Network UPS Tools servers inside the allowed subnets and reads them with list commands only. It never logs in to a UPS or sends it commands. Set how often UPS readings refresh between full scans.
- SNMP interface lookups fill in physical NIC addresses and link state for the Proxmox nodes you name, over SNMPv3, when the Proxmox API leaves them out.
- MikroTik discovery listens for MNDP announcements without sending anything. Announcements do not cross routers, so the collector must share a network segment with your MikroTik devices.
7. Run the collector
The collector is a separate process from the web app. Try one cycle first, then list what it stored:
python -m labrat.collector --once
python -m labrat.collector --list
Run it without either switch to keep polling (full scans every 60 seconds, or what [collector] interval_seconds or --interval sets). Between scans it also reads internet and UPS status on shorter timers. It reloads local_config.toml before each full scan, so Settings changes need no restart. Run it under your service manager, beside the web app.
Within a minute or two, the Sources strip under the header and the Home page show each source's health. A source that fails keeps its last observations, marked stale, instead of dropping them.
8. Map your lab
Add a location and its areas in Locations, then add racks in an area's Floor plan. In Discovery, select a device and place it: create a new inventory record (the default) or link it to an existing one, then choose the area and position. The tour walks through every page.
9. Move your install
Settings → Export and import moves a whole install to a new way of hosting it. Download export gives one ZIP file with the entire database (inventory, discoveries, accounts, and history) and every integration, credentials included, so store it like a password. On the new install, Import and replace replaces all of that with the export's contents and signs you out; sign in with an account from the old install. The new install keeps its own [server], [database], and [auth] settings, which describe where it runs. An export from an older LabRat is migrated as it is imported; one from a newer LabRat is refused.